Pulsar Integrated Ballistic System
-
0
 Comments
- Last updated: 06/12/2023


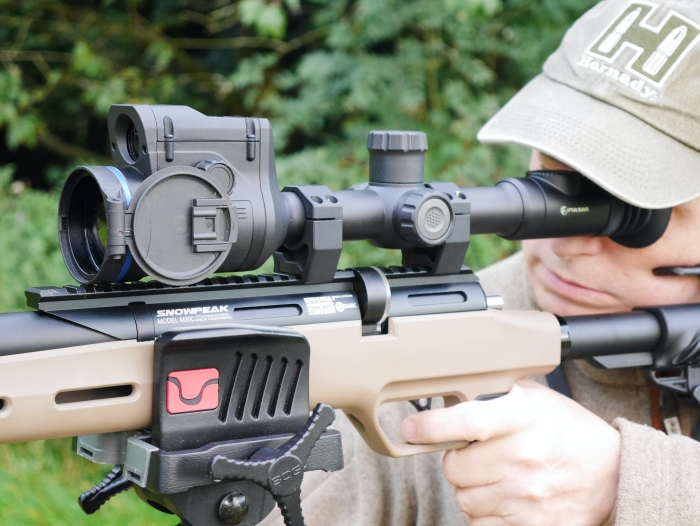
I’ve reported before on how ‘multispectral’ is the current buzzword in electro-optics, and how Pulsar is making it a reality by creating devices that integrate signals from different parts of the electromagnetic spectrum to enhance the hunter’s capability in the field. The prime example is the Thermion 2 DXP50/55 Duo riflescope (previously reviewed here), which integrates a 4K colour camera into Pulsar’s flagship thermal riflescope, letting you switch seamlessly between channels, or view both at the same time via the picture-in-picture function.
In the Duo, the daylight camera module sits on top of the objective bell, a location occupied in Pulsar’s Thermion 2 LRF models by a precise and powerful (+/-1m @ 1000m) laser rangefinder. Available for several years, strictly speaking, the LRF models are also ‘multispectral’, since - like most tubed and CMOS/CCD-based night vision devices - the laser works in the ‘near infrared’, so-called because it is part of the spectrum nearest the sensitivity of the human eye, whereas the thermal sensor detects emissions in zones far beyond it.
All good, but what the LRF models have lacked until now, and what now makes them properly multispectral, is the integration of the data from the rangefinder into the reticle of the riflescope. Pulsar has achieved this by linking its smartphone-based Stream View Ballistic Calculator app to enhanced firmware in the scope. The app has been available for some time as a standalone tool, but, when connected with the Thermion’s built-in rangefinder, the whole becomes considerably greater than the sum of the parts!
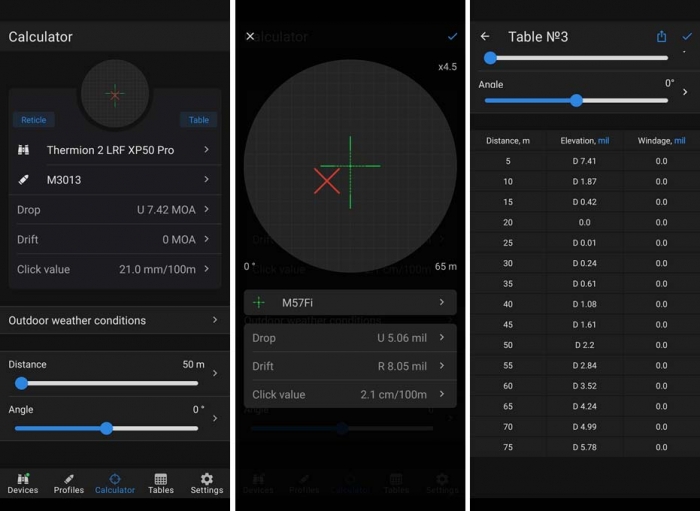
Setting up a profile in the app is quite straightforward. That said, shooters accustomed to using the popular Strelok Pro app for their ballistic prediction needs, may feel that Pulsar could learn something from its interface. For example, the angle, target range, and other variables must be set via sliders, with no text-input option, and, instead of completing then OK-ing a single form containing multiple parameters, every piece of data entered (complete with its unit of measurement) must be individually confirmed via a blue tick. There’s also only one box for BC, with no option to enter different figures for specific velocity ranges. Moreover, Strelok also works with your phone’s camera and inclinometer to establish target angle, whereas Pulsar’s app requires the use of a rangefinder with angle compensation, such as the one built into the Thermion 2 LRF!
You can configure up to five custom profiles in the Ballistic Calculator app by inputting key parameters such as the muzzle velocity; the projectile type and ballistic coefficient; the offset between the sight and the bore; the zero distance; and the atmospheric conditions (temperature, air pressure, and humidity) when the zero was established.
Whilst the firmware in Pulsar’s riflescopes has always enabled the user to set up multiple zeroing profiles, designating each with a letter (A-E), integration with the app has added a degree of sophistication, extending the designation to five characters, thereby enabling names such as ‘22RSS’ (.22 rimfire segmented subsonic) or ‘24358’ (243/58-grain) that eliminate the risk of shooting on the wrong profile. The 5-character limit is dictated by the available space in the information bar in the scope’s display, where it is conveniently shown for at-a-glance reference, but it would still be helpful if the app provided a line in which to write more complete identification of the rifle/cartridge/projectile combination.
Once set up in the app, profiles can be sent to the riflescope via its Bluetooth connection. The initial link-up requires a security code. I won’t reproduce Pulsar’s instructions here but suffice it to say that a little reading will save a lot of swearing! The connection itself was, at least with my Android phone, somewhat Jekyll-and-Hyde, so either sweet as a nut or stubbornly uncooperative, and I had similar tussles with getting the scope to recognise profile updates made in the app. I’m sure that with a bit more figuring-out time all this would have been resolved, but review loans are sometimes too brief to optimise ‘operator competence’ in the way ownership does!
With the app set up, and the desired profiles created and installed, it was time to get shooting! Step 1, before you send a single round downrange, is to re-check all your profile data, since inputting the most accurate data you can obtain will produce the most accurate predictions. This includes inputting the current weather data (which the app can be set to access automatically via your phone’s 4G connection) and establishing the target angle using the built-in rangefinder.
Step 2 is to obtain a really precise zero. Pulsar’s one-shot zero function will get you very close, very quickly, but it’s still important to fine-tune it using the highest possible magnification in zeroing mode to obtain the smallest ‘click’ values. For quick-and-easy control in zeroing mode, use the magnification button to zoom in and the camera button to freeze the image.
Step 3 is to progressively extend the range as far as you can, logging your mean points of impact at each distance. This will let you go back into the app and adjust the data to correlate it to real-world results.
As a rule-of-thumb: a point of impact that’s higher or lower than the app predicts is most likely due to a real-world ballistic co-efficient that differs from the projectile manufacturer’s estimate. Manufacturers typically give a single BC figure. But BC is dependent on velocity, changing as the bullet slows down on the way to the target, so any published BC figure should be treated as a guide only. Thus, if the shots strike higher than expected, the BC figure may be too low, causing the calculator to overestimate the drag. The solution is therefore to increase the BC and observe the effect on target. A small change in BC should fix the discrepancy. If it doesn’t, and the weather is warmer than it was when you zeroed, try increasing the velocity figure (re-chronoing if possible). Conversely, if impacts are low, the BC or velocity figures may be too high. If you still can’t get a match, then re-check the accuracy of your other inputs, including wind speed and direction. Take your time tuning each profile. Rushing is a recipe for frustration at best and wounding at worst but do things right and the results are seriously rewarding!
The system is obviously most useful with lower-velocity projectiles that show marked drop at normal hunting ranges, such as airgun pellets/slugs, and .22LR bullets. However, when set up with due care, and used with consideration for wind, it also offers the confidence to take foxes with a centrefire at ranges significantly beyond point-blank.
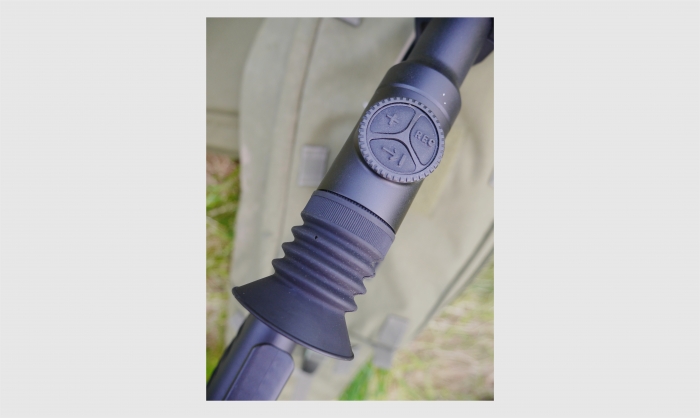
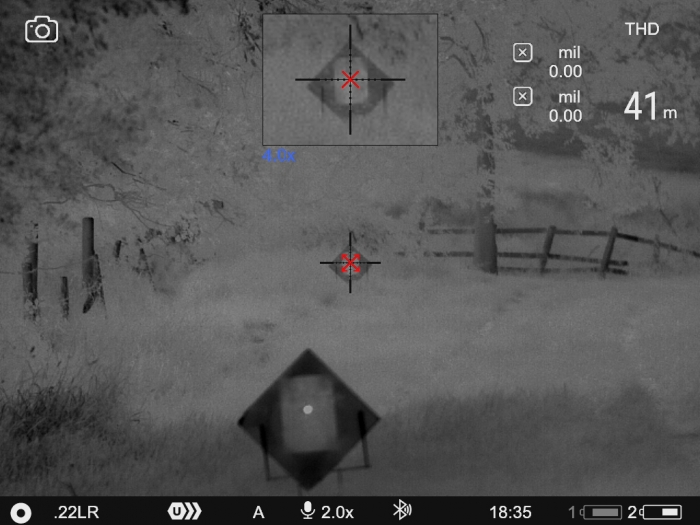
Once you have everything dialled in, you’re ready for a shooting experience that can be best described as ‘god mode’! Find your target, press the ranging button on the eye bell to bring up the range, press again to confirm, use the ‘X’ that appears in the crosshairs as your aiming mark, and when you press the trigger, that’s where the projectile will strike.
I started off with the Thermion on a sub-12 ft/lbs .22 PCP. I’ve spent all my life applying hold-over or dialling in to get .22 pellets on target, and suddenly to be able to aim on at all ranges felt amazing. It’s good for really close-range work, too, making for a memorably successful outing on the rats. 5m or 45m, it didn’t matter, the Thermion was on them in an instant, every time!
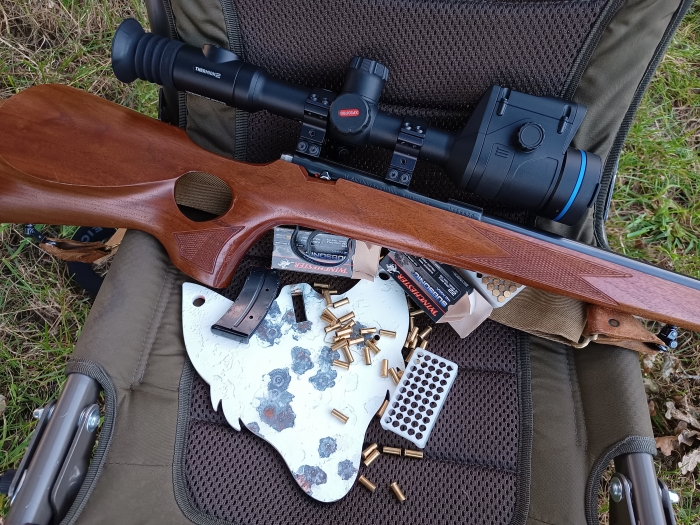
Next up was the .22LR. VHD has completely knocked out the rabbits on my ground, so steel was on the menu this time. I had a warm afternoon with the sun behind me, so the targets were clear in the thermal. As expected, the steel bunny at 50m was no problem, but neither was the one at 100m or the fox-head at 150m. At 200m, my elevation was spot-on, but I needed to tweak the wind in the app before I was connecting consistently. That aside, there is no thinking required, just lase, confirm, aim, and shoot.
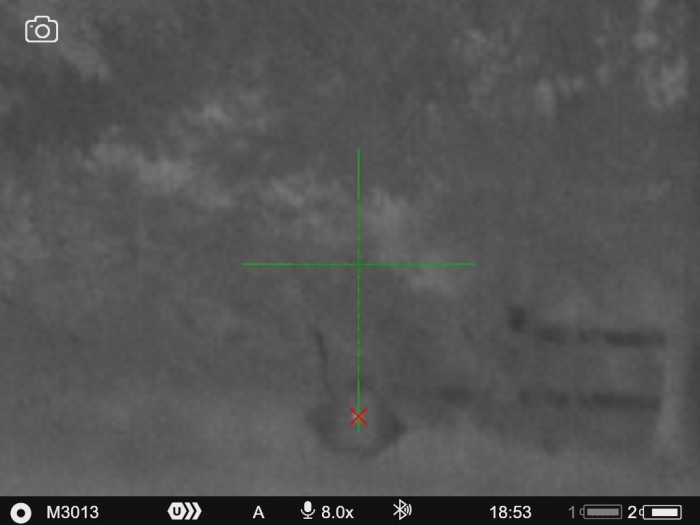
Me being me, I’d like to see a couple of tweaks to the firmware. First: the ‘X’ is far too big, since every pixel outside the centre hides target information. Better would be a single dot or a horizontal line of a defined width in MOA/MILS for on-the-fly windage corrections. Also, once activated, the ‘X’ never disappears, so a user-settable time-out would be welcome. Conversely, the ballistic information (drop/windage) shown in the display after lasing disappears much too quickly, so let’s have a configurable time-out there, too. Key points here are that all these items are ‘just’ firmware; that Pulsar update their firmware regularly; and that they listen to customer feedback – and sometimes to reviewers, too!
I’ve barely written here about the Thermion 2 LRF XP50 Pro that was the testbed for this review of Pulsar’s new integrated ballistics, but it’s worth mentioning that the above also applies to the XG50 Pro and XQ50 Pro models and is sure to be present in future range-finding Pulsar scopes. It is the future, and it’s available now.
click on image to enlarge
click on image to enlarge

click on image to enlarge
click on image to enlarge
click on image to enlarge
click on image to enlarge
click on image to enlarge
click on image to enlarge